
How to make pillows out of shirts, first, lay the shirt flat and cut it to your desired size. Then, sew the pieces together, leaving an opening to insert the filling.
Making pillows out of shirts is a meaningful way to repurpose old clothing and create sentimental keepsakes. Whether it’s a cherished t-shirt or a beloved button-up, transforming these items into pillows allows you to preserve the memories attached to them.
With some simple sewing skills and a few basic materials, you can easily transform a shirt into a decorative and personalized pillow that will bring comfort and nostalgia to any space. We’ll provide a step-by-step guide on how to make pillows out of shirts, offering a creative and sustainable solution for repurposing old clothing into functional and sentimental decor.
How to Make Pillows Out of Shirts?
Methods For Making Pillows Out Of Shirts
Learn how to make pillows out of shirts with these easy methods. Create unique and personalized cushions by repurposing old clothes into stylish pillow covers. Sew or no-sew options available!
If you have some old shirts lying around and want to repurpose them into something useful, making pillows out of shirts is a great idea! Not only is it a fun and creative DIY project, but it also allows you to add a personal touch to your home decor. In this blog post, we will discuss three different methods for making pillows out of shirts. Whether you prefer sewing or a no-sew approach, we’ve got you covered. Let’s dive in!
Method 1: Sewing Front And Back Panels Together
If you’re comfortable with a sewing machine and want to create a traditional pillow with both a front and back panel, this method is perfect for you. Here’s how you can do it:
- Start by measuring and cutting the front and back panels of the shirt to the desired size for your pillow.
- Next, pin the panels together with the right sides facing each other.
- Using a sewing machine or needle and thread, sew around three sides of the pillow, leaving one side open for stuffing.
- Trim the corners of the pillow to reduce bulk when you turn it right-side out.
- Turn the pillow right-side out through the open side.
- Finally, stuff the pillow with the filling of your choice, then hand stitch or use the sewing machine to close the opening.
Method 2: Sewing A Shirt Into A Pillow
If you want to preserve the existing design or graphics on the shirt, sewing the shirt itself into a pillow is a fantastic option. Here’s how you can do it:
- Begin by cutting off the sleeves and collar of the shirt, leaving only the front and back panels intact.
- Turn the shirt inside out and pin the bottom edge closed.
- Using a sewing machine or needle and thread, sew along the bottom edge to create a pocket.
- Turn the shirt right-side out, and it will now resemble a pillowcase.
- Fill the shirt with the stuffing material, distributing it evenly.
- Finally, sew the top edge of the shirt closed, either by hand or using a sewing machine.
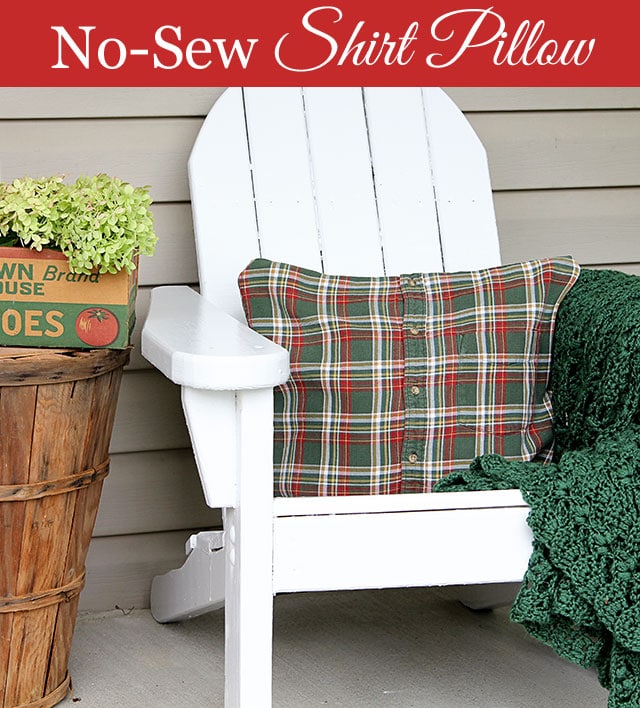
Method 3: No-sew T-shirt Pillow
If sewing isn’t your thing or you’re in a hurry, you can still create a beautiful pillow using a no-sew method. Here’s how:
- Start by cutting out the front and back panels of the shirt to the desired size for your pillow.
- Place the panels on top of each other with the right sides facing inward.
- Using fabric glue or fusible bonding tape, adhere the edges of the panels together, leaving a small opening for stuffing.
- Once the glue or tape has dried, turn the pillow right-side out through the opening.
- Stuff the pillow with your preferred filling, then close the opening using more glue or tape.
Now that you have learned three different methods for making pillows out of shirts, you can unleash your creativity and transform those old shirts into unique and stylish pillows for your home. Whether you prefer sewing or a no-sew approach, these methods are accessible even for beginners. Get ready to add a personal touch to your home decor with these DIY shirt pillows!
Step-by-step Instructions For Sewing A Memory Pillow
Create your own memory pillows by following these step-by-step instructions for sewing a memory pillow out of shirts. Learn how to measure, cut, sew, and insert pillow fill to repurpose old clothes into unique and sentimental cushion covers.
Measuring And Ironing The Fabric
To create a memory pillow from a shirt, the first step is to measure and iron the fabric. Lay the shirt flat to measure the dimensions needed for the pillow.
Cutting The Fabric
After measuring and ironing, the next step is to carefully cut the fabric according to the measurements taken. Ensure precise cutting for a neat finish.
Sewing The Front And Back Panels Together
Once the fabric is cut, sew the front and back panels together, ensuring the stitches are secure to hold the pillow in place.
Cutting Corners And Inserting Pillow Fill
After sewing the panels, proceed to cut the corners for a clean edge. Then, carefully insert the pillow fill to achieve the desired firmness.
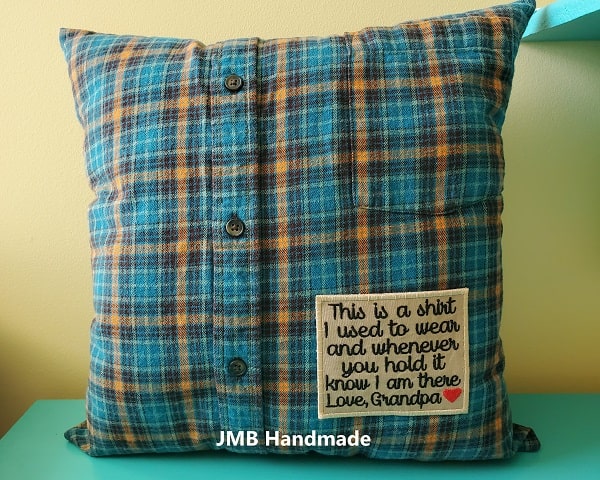
Variations And Customizations
Once the pillow is assembled, consider adding personal touches such as embellishments, embroidery, or decorative stitching. Customize the memory pillow to make it truly unique.
Step-by-step Instructions For Sewing A Shirt Into A Memory Pillow
Welcome to our step-by-step guide on how to transform a cherished shirt into a cozy memory pillow that will hold a special place in your heart. Let’s get started on creating a memorable keepsake that you’ll treasure for years to come.
Pinning Collar To Shoulder
Ensure the shirt is laid flat and the collar is carefully pinned to the shoulder of the shirt. This step ensures the collar stays in place during the sewing process.
Pinning Shoulders And Collar
Pin the shoulders and collar together, securing the fabric for the next stage. This step will prepare the shirt for the subsequent sewing and finishing of the pillow.
Finishing The Back
After pinning, it’s time to finish the back of the shirt, ensuring all edges are neatly secured and the fabric is prepared for the final assembly.
Stitching Down Collar
Next, meticulously stitch down the collar, ensuring a durable finish that highlights the shirt’s unique design. This step brings the pillow closer to completion.
Sewing Front And Back Together
Proceed to stitch the front and back of the shirt together, aligning the edges carefully. This crucial step brings the pillow to life.
Stuffing The Pillow Form
Add the desired amount of stuffing into the pillow form, ensuring it is evenly distributed to achieve the desired plumpness and comfort.
Finalizing The Pillow
Finally, complete the memory pillow by meticulously closing any remaining openings, giving the shirt a new purpose and your memories a tangible form to cherish forever.
Step-by-step Instructions For Making A No-sew T-shirt Pillow
Learn how to make pillows out of shirts with these step-by-step instructions. No sewing required. Turn your old shirts into cozy and stylish pillows in just a few easy steps.
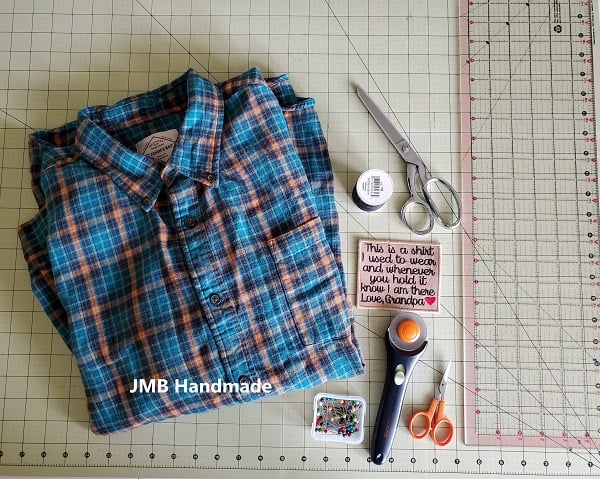
Supplies And Tools Needed
To make a no-sew t-shirt pillow, you will need the following supplies and tools:
- Old t-shirt
- Scissors
- Fabric adhesive tape
- Pillow form or stuffing
- Measuring tape
Stabilizing The T-shirt Fabric
To ensure the t-shirt fabric stays in place, you will need to stabilize it using fabric adhesive tape.
Cutting And Assembling The Pillow
Follow these steps to cut and assemble the t-shirt pillow:
- Lay the t-shirt flat and smooth out any wrinkles.
- Measure and mark the desired size of your pillow on the t-shirt fabric using a measuring tape.
- Use the scissors to cut along the marked lines.
- Place the front and back fabric panels together, with the patterned sides facing inward.
- Align the edges and secure them using fabric adhesive tape.
Installing And Sewing The Zipper
Adding a zipper to your t-shirt pillow allows for easy removal and cleaning. Here’s how to install and sew the zipper:
- Create an opening on one side of the pillow by cutting a straight line along the edge.
- Place the zipper face down along the cut edge, aligning the zipper teeth with the fabric edge.
- Secure the zipper in place using fabric adhesive tape or pins.
- Using a sewing machine or needle and thread, sew along the edges of the zipper to attach it securely to the fabric.
Finalizing The T-shirt Pillow
Follow these steps to complete your no-sew t-shirt pillow:
- Remove any excess fabric or threads.
- Turn the pillow right side out through the zipper opening.
- Insert the pillow form or stuffing through the opening.
- Zip up the pillow and fluff it to distribute the filling evenly.
- Your no-sew t-shirt pillow is now ready to be enjoyed!
Conclusion
Transforming old shirts into pillows is a creative and sustainable way to repurpose sentimental clothing items. By following simple steps like measuring, cutting, sewing, and filling, you can easily create personalized pillows that hold cherished memories. Whether you want to honor a loved one or simply give new life to old shirts, making pillows out of shirts is a fulfilling DIY project that adds a special touch to your home decor.
Get ready to upcycle and create beautiful pillows that tell a story.