How to stitch pillow, use a slip stitch or a ladder stitch to close the opening neatly and invisibly. Choose a matching thread for a seamless finish.
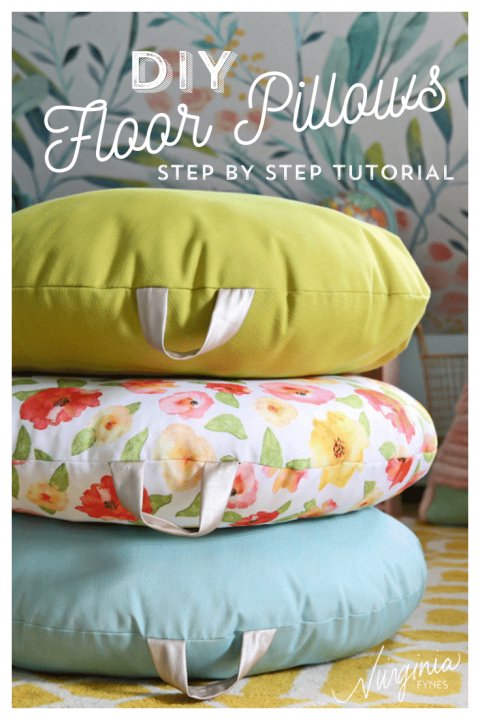
If you’re looking to add a personal touch to your home decor, making your own throw pillows is a great way to express your style and creativity. Whether you’re a sewing novice or an experienced crafter, making a pillow is a simple and enjoyable project.
With just a few materials and some basic sewing techniques, you can create custom pillows that complement your home’s aesthetic perfectly. In this guide, we’ll walk you through the process of stitching a pillow, from choosing the fabric and filling to sewing the cover and adding decorative touches. Whether you’re looking to refresh your living space or create a thoughtful handmade gift, learning how to stitch a pillow will open up a world of creative possibilities.
How to Stitch Pillow?

Supplies Needed
When it comes to stitching a pillow, having the right supplies is essential. Not only will the right tools make your stitching process easier, but they will also ensure a professional finish to your project. In this section, we will discuss the supplies needed for pillow stitching, including choosing the right fabric and essential tools.
Choosing The Right Fabric
One of the first steps in pillow stitching is selecting the right fabric. The fabric you choose will determine the overall look and feel of your pillow. Here are a few factors to consider when choosing fabric:
- Material: Opt for fabrics that are durable and can withstand frequent use, such as cotton or linen.
- Pattern: Decide if you want a solid color or a patterned fabric for your pillow. Consider the style of your room and the overall aesthetic you want to achieve.
- Texture: Think about the texture of the fabric and how it will complement the design of your pillow. You may want something soft and cozy or something more sleek and modern.
Essential Tools For Pillow Stitching
Having the right tools is crucial for a successful pillow stitching project. Here are some essential tools you will need:
- Needles: Use sharp, sturdy needles that are appropriate for your fabric. Choose a needle that can easily glide through the fabric without causing damage.
- Thread: Select a high-quality thread that matches the color of your fabric. This will ensure a seamless finish to your stitches.
- Pins: Use pins to hold the fabric pieces together before sewing. Opt for pins with colorful heads, so they are easy to spot and remove as you stitch.
- Scissors: Invest in a sharp pair of fabric scissors that are dedicated solely to your sewing projects. This will ensure clean and precise cuts.
- Measuring tools: Have a measuring tape or ruler on hand to ensure accurate measurements when cutting your fabric pieces.
- Sewing machine (optional): If you prefer using a sewing machine for faster stitching, make sure it is in good working condition with the appropriate needles and thread.
With these supplies in hand, you are ready to embark on your pillow stitching journey. Remember to take your time, follow the instructions carefully, and enjoy the process of creating your very own custom pillow.
Step 1: Preparing The Fabric
Learn how to stitch a pillow by following Step 1: Preparing the Fabric. This essential step sets the foundation for a successful pillow-making project and ensures a professional-looking final product.
Measuring And Cutting The Fabric
Before starting to stitch a pillow, it’s essential to measure and cut the fabric accurately. Use a measuring tape to determine the size of the pillow you want to create. Mark the measurements on the fabric using a fabric pencil or chalk. Double-check the measurements to avoid any mistakes in cutting. Once the measurements are marked, use fabric scissors to cut along the lines precisely.
Adding Any Decorative Embellishments
If you want to add any decorative embellishments to your pillow, such as lace, pom-poms, or embroidery, now is the time to do so. Carefully pin or baste the embellishments onto the fabric before moving on to the next step. Ensure that the embellishments are securely attached and evenly distributed on the fabric.
Step 2: Pinning The Pillow Pieces
Step 2 of stitching a pillow involves the crucial task of pinning the pillow pieces together. This step ensures that the fabric stays in place and does not shift during the sewing process. Proper alignment and placement are essential to achieve a well-crafted and symmetrical pillow. Additionally, securing the layers with precision will result in a professional-looking finish. Let’s delve into the specifics of pinning the pillow pieces for a seamless sewing process.
Ensuring Proper Alignment And Placement
Before pinning the pillow pieces, carefully align the edges and corners of the fabric to ensure they match perfectly. This step is critical in achieving a neat and symmetrical pillow. Use straight pins to hold the pieces in place, ensuring that the fabric layers do not shift during the sewing process. Take your time to align the fabric accurately to avoid any inconsistencies in the final product.
Tips For Securing The Layers
- Layer the fabric pieces on a flat surface to ensure evenness and consistency.
- Use quality straight pins to secure the layers firmly. Ensure that the pins penetrate through all the layers of fabric to prevent any shifting during sewing.
- Space the pins evenly along the edges to maintain uniformity in the pillow shape and size.
- For curved edges, use pins to ease the fabric around the curves and prevent any puckering or folding.
Step 3: Stitching The Pillow
For stitching the pillow, start by aligning the edges of the fabric and securing them with pins. Then, using the ladder stitch, sew the edges together by looping the thread through the fabric, creating an invisible seam. Finally, tie off the thread and remove the pins, leaving a neatly finished pillow.
Selecting The Right Stitch Type
Before you start stitching your pillow, it’s important to select the right stitch type for your project. The type of stitch you choose will depend on the fabric you’re working with and the desired aesthetic. Here are some popular stitch types for pillow stitching:
- Straight Stitch: This is the most basic and commonly used stitch for pillow stitching. It creates a simple, straight line and is great for securing seams.
- Zigzag Stitch: If you’re working with stretchy or knit fabrics, a zigzag stitch is ideal. It provides more flexibility and prevents the seam from popping when the fabric stretches.
- Backstitch: This stitch is perfect for adding extra strength to your pillow seams. It involves sewing forward and then sewing backward over the same stitches, creating a secure and durable seam.
Choosing the right stitch type will ensure that your pillow is stitched securely and looks professionally finished.
Techniques For Stitching Straight And Even Seams
Stitching straight and even seams is essential for creating a polished and well-made pillow. Here are some techniques to help you achieve straight and even stitches:
- Use a ruler or measuring tape to mark a straight line along the fabric before sewing. This will serve as a guide for stitching straight seams.
- Hold the fabric firmly but not too tightly as you sew. Tension in the fabric can cause your stitches to be uneven.
- Keep your eyes focused on the point where the fabric meets the needle, rather than looking directly at the needle. This will help you maintain a straight and even line.
- Go slow and steady. Rushing can lead to jagged or crooked stitches. Take your time and keep a consistent sewing speed.
- If you’re having difficulty stitching straight, try using a fabric marker or tailor’s chalk to draw a guideline. This will make it easier to sew along a straight line.
By implementing these techniques, you’ll be able to achieve professional-looking straight and even seams on your pillow.
Step 4: Finishing The Pillow
In the final step, carefully hand sew the opening of the pillow closed using a ladder stitch for a seamless finish. This invisible stitch technique ensures a professional look and is perfect for closing up handmade pillows.
Trimming Excess Fabric And Threads
Once you have completed sewing the pillow closed with a ladder stitch, it’s time to trim any excess fabric and threads. Using a sharp pair of fabric scissors, carefully trim the edges of the pillow, ensuring that you do not cut into the stitched area. This will give your pillow a clean and professional finish. Make sure to remove any loose threads as well, as they can detract from the overall appearance of the pillow.
Turning The Pillow Right Side Out
Now that you have trimmed the excess fabric and threads, it’s time to turn the pillow right side out. Gently reach inside the opening of the pillow and begin pulling the fabric through. Take your time to ensure that the corners are fully turned out, using your fingers or a blunt tool to push them out if necessary. Once the pillow is right side out, give it a gentle shake or pat to fluff it up and shape it.
Summary
Trimming excess fabric and threads and turning the pillow right side out are the final steps in finishing your pillow. By trimming the edges and removing any loose threads, you create a clean and polished appearance. Turning the pillow right side out gives it a professional finish, ensuring that all the seams are hidden. With these simple steps, your handmade pillow is complete and ready to be enjoyed!
Step 5: Stuffing And Closing The Pillow
Learn how to stitch a pillow closed with the step-by-step process of stuffing and closing. Follow these guidelines for the perfect finish and discover the best stitch for a seamless look.
Now that you have sewn all around the edges of the pillow, it’s time to stuff it and close the opening. This final step will complete the pillow and give it a plump and finished look. Follow these simple instructions to insert the pillow form or stuffing and use a ladder stitch to seam the opening.
Inserting The Pillow Form Or Stuffing
To give your pillow the desired shape and support, you can either use a pillow form or stuff it with polyester filling or foam. Here’s how you can do it:
- Choose a pillow form that matches the size of your pillow cover. You can find pillow forms in various sizes and shapes at your local craft store or online.
- If you prefer to use stuffing, take a handful of polyester filling or foam. Loosen it slightly to make it fluffy and easier to work with.
- Start inserting the pillow form or stuffing through the opening that you left earlier. Gently push it towards the corners to ensure an even distribution.
- Continue adding the pillow form or stuffing until the pillow reaches your desired level of fullness. Remember not to overstuff it, as it may affect the shape and comfort of the pillow.
Using A Ladder Stitch To Seam The Opening
To seamlessly close the opening of your pillow, you can use a ladder stitch, also known as an invisible stitch. This stitch creates an almost invisible seam, leaving your pillow looking neatly finished. Here’s how you can do it:
- Thread a needle with a thread that matches the color of your pillow cover.
- Starting from one end of the opening, fold the raw edges of the fabric inward and align them. Hold them together with your fingers.
- Take a small stitch on one side of the opening and then cross over to the other side.
- Continue alternating sides with small stitches, making sure to catch only a few threads of fabric each time. This will create a ladder-like pattern.
- As you stitch, gently pull the thread to tighten the seam and close the opening.
- Continue stitching until you reach the other end of the opening.
- To secure the stitch, take a few small stitches at the end and tie a knot. Trim any excess thread.
By following these steps, you can effortlessly stuff and close your pillow, giving it a professional finish. Now, your handmade pillow is ready to add comfort and style to your home decor. Enjoy!
Conclusion
When it comes to stitching a pillow, one of the best techniques to use is the slip stitch or ladder stitch. This stitch is ideal for closing up a handmade pillow as it is invisible and leaves a neat finish.
By using a thread that matches your fabric, the stitches will be barely noticeable. With this simple and secure stitch, you can achieve professional-looking results. So, go ahead and try out this method for a beautifully stitched pillow!